Tuesday, July 31, 2012

Awards!


I've been slowly plodding along with my blog for a couple of years now, changing direction, doing my thing and just doing it for myself really - I've also used it to help fundraise for the Cancer Council, and organise events. So even though I've only ever really done this for myself and have my own creative outlet, it's still nice when someone else recognises your work, which is what fellow blogger Michelle from Jarrah Jungle has done by awarding myself and 4 other blogs with the Leibster Blog award!

Liebster is German for "dearest." The purpose of the Liebster Award is to help "newbie" blogs with less that 200 followers get noticed with a sort of sweet "Shout Out" of attention, and likewise, a sort of "Pay It Forward" is included, to help other blogs get due notice and attention.


How it works:

(1)Make a Post about your win putting the award button in your post.
(2)Link back to (& follow)the blogger who nominated you for the award.
(3)Pick five blogs with less than 200 followers that you feel deserving of the Liebster Award, and leave them a comment on their blog to let them know you've nominated them.
(4) Tell the 5 blogs you've chosen to 'Pay It Forward' and 'Share some Blog Love' by following the instructions for 5 more newbie blogs.
(5) Share five random facts about ourselves.


Ok, so here are the 5 random facts about me!


1) I hate coriander. HATE IT! The smell, the taste, both so pungent and nostril invading. It's awful. It's not my fault though, according to science, it's genetic. Ground coriander is delicious. Fresh coriander is the DEVIL!


2) I only have 1 kidney. I was diagnosed with Wilms tumour when I was a new born baby, and my parents were faced with the decision to either remove it, or have me undergo chemo to save it and allow me a life with 2 kidneys. They chose to get rid of it - and I have never had a problem with it! My lone kidney is a ripper, and I reckon it must be huge by now! Life is no different with one kidney, you just have to make sure you play no contact sports because if you get a knock to the kidney and damage it, you have no back up. So far so good, fingers crossed!


3) I have a VERY low tolerance to constant whingers and victims. I very much believe that you must BE the change you want to see, and those who stand around and complain that things aren't as they'd like, but do nothing, give me the shits. Accept who you are, flaws and all - only then can you really take steps toward self improvement.


4) I speak Dutch - I lived in the Netherlands for 2 years as a nanny, and while I was there I learned the language fairly well. It got to a stage where someone knew I had a weird accent but couldn't put their finger on where I was from - they guessed Belgium, where they are native Flemish speakers, a dialect of Dutch. I was stoked they thought I was a native speaker! I love speaking it, it's quite a musical language and they often sound like they're about to laugh mid sentence. Would LOVE to go back, I only left because my visa expired and I couldn't stay, and I was totally gutted - I was in love with the place!


5) I love going home to visit my parents, even though I don't go that often. Aside from going home to see the olds and my dog, Mum and Dad always make me cook dinner, which is awesome, because they give me their wallet and tell me to go shopping. AWESOME! I can make what I want. Mum n Dad love it because they don't have to cook, and I love it because I can cook with a bigger budget than what I'm used to. Bonus!


Here are my 5 fave smaller blogs!


1) Lifes Shiny Pretty Things by Anna Ogilvie. A cute blog about life, goals, travel, love and la dolce vita!


2) Eat Meets West by Bri Whitton. LOVE this blog. Recipes and posts about how good it is to live in Perth. Writes with a voice that is totally hers and it always makes me smile. She also cooks delicious things, I know, I've tried them!


3) Col Panna by Liv Bambola. Recipes that are totally replicable at home, and some fab cakes! Most recipes have step by step instructions, you cannot go wrong! A gorgeous gal with a lovely fella, and a cute dog!


4) Musings of a happy life by Kirstie Fitzgerald. Does pretty much what it says on the box. She writes about stuff she loves, what shes up to, and extra bits and bobs. Its a new find, even though I've been following her on Twitter for a while! Def worth a read!


5) Food Endeavours of the Blue Apocalypse by Ai-Ling Truong. I don't know if she has less than 200 followers or not, I doubt it, she would have more - but she's worth the inclusion. I love this blog because you learn something in every post, they're all really well researched and cover aspects of whatever topic she's writing about that you never thought of. Mostly foodie posts but a few other ones about music and events going on in Perth too! I also think her random facts about herself will be interesting!


So now you guys have to "pay it forward" and follow the 5 steps that I did. Though of course, "have to" is a strong word. I just want to read your random facts :D

Tuesday, July 17, 2012

Herbed Lamb with Almond Olive Couscous

This is another recipe that has been inspired by Donna Hay and her book Fast, Fresh, Simple. To be honest, it's not a book that I flick through and find much inspiration from. There are A LOT of recipes in there, they're all really short and it seems a bit impersonal. However when I used Eat Your Books, a website that catalogues your cookbooks and allows you to search for recipes by book/ingredient etc) there were a lot of recipes from the book that appealed to me, and as such I have cooked quite a bit from it! This is another recipe, but I tweaked it a bit as it was a bit TOO simple for me!


Sorry about the phone pic, I had just been for a run and was STARVING!

This is a great post workout meal, as you've got a big hunk of protein sitting on top of a bed of carbs! It's also a great lunch, it'll keep you going for hours! This is so fast, delicious and will leave you feeling satisfied afterwards! You can sub in quinoa or any other similar grain/carb that can soak up flavours.


The quantities will be a bit free n easy - it's really up to you to add as much or as little as you like! You should end up with some couscous leftover for lunch the next day!


Ingredients
2 portions of lamb (whichever you prefer to eat)
3 tbsp oregano or marjoram (dried or fresh - I used dried)
1 cup couscous
Hot stock (enough to cover your couscous about 1-1.5 cups - I used chicken that I made earlier)
Handful of almonds
Handful of green olives (chopped)
Handful of fresh spinach
Lemon wedge
Extra virgin olive oil
Salt and pepper


Method
1) Lightly oil your lamb and sprinkle 2 tbsp of your herb over the lamb, and grill them over a high heat to your preferred "doneness".
2) Pour your couscous into a large bowl with the rest of the herbs, and pour over the hot stock. Cover and leave until you are ready to serve.
3) Chop your almonds and olives roughly. When the lamb is done, take it off the heat to rest until everything else is done.
4) Fluff up the couscous with a fork (if you use a spoon it clumps) and add your almonds, olives, and spinach and mix to combine. Add a generous squeeze of lemon, a glug of olive oil and season with salt and pepper.
5) Slice up your lamb, pile the couscous onto your plate and place the lamb on top. EAT!


Friday, July 13, 2012

Amazing bread!

I have sung the praises in a previous post about the book Artisan Bread in 5 Minutes a Day, and so I thought that I should share the recipe for the bread here, because its THAT easy, and the dough is SO good to work with.


It's commonly known that for doughs and pastries, everything handles better when it's cold. That is one massive plus of this dough, when it's finished its first rise, it goes in the fridge to mature further - meaning when you take it out to bake, its fridge cold. This dough does not stick much and requires minimal dusting of flour to get it under control. It's a gorgeous dough to use. The recipe I'll give you is the "master" recipe, the plain and simple boule dough, the artisan free form loaf. The book has plenty of other variations, in fact, today I have a put a dough in that's a mix of dark rye flour, plain unbleached flour, and LSA - it's rising at the moment so stay tuned for how that one turns out!


In the meantime, get baking, with the best recipe for bread I've ever used - it's even easier than soda bread! For best results you need a pizza stone/marble slab, which can be picked up fairly cheaply from some markets, or sold from offcuts from benchtop stores (which is where I got mine!).


Boule dough


3 cups lukewarm water
1.5 tbsp granulated yeast (2 packets)
1.5 tbsp course salt
6.5 cups unsifted, unbleached, all purpose white flour
Cornmeal for pizza peel


NB - I don't use corn meal and I don't have a pizza peel. I just use baking paper, some flour and a round, flat rimmed pizza tray. 


Method
1) Warm the water slightly, it should feel just above body temperature. Warm water will rise the dough to the right point for storage in about 2 hours. You can use cold tap water and get an identical result but will take you 3-4 hours. It doesn't make much of a difference as you only do this once per stored batch.


2) Add yeast, water and salt to in a resealable lidded container (a pretty big one - I'm using a big pot at the moment!), don't worry about getting it all to dissolve.


3) Mix in the all the flour at once, kneading is unnecessary. Mix with a wooden spoon, the dough hook of your food processor until the mixture is uniform. You can use your hands if the spoon is difficult, just wet your hands and press the mixture together - don't knead! You're finished when everything is uniformly moist without dry patches. This step should be done in a couple of minutes, and will yield a dough that is wet and loose enough to conform to the shape of its container.


4) Cover with a lid (not airtight) and allow to rise at room temperature until it begins to collapse (or at least flattens on top), approx 2 hours (depending on the water/rooms temperature). Longer rising times, up to about 5 hours, will not harm the end result. You can use a portion of dough at any time after this period. Fully refrigerated dough is easier to work with than dough at room temperature, so the first time you use this method, it's best to refrigerate the dough overnight (at least 3 hours) before shaping a loaf.


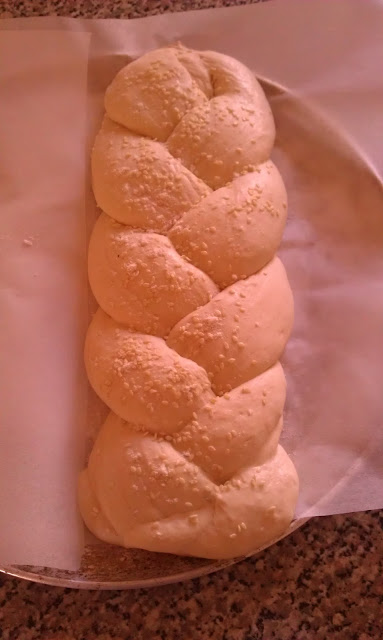
5) On baking day! Prepare your surface (pizza peel with corn meal, floured surface, baking paper - whatever you like as long as you can get the dough into the oven quickly and easily, as its hot!). Take about a grapefruit sized piece of dough from the container in your fridge and put it on your prepared surface. Sprinkle the surface of your dough with flour and shape it (add flour as needed to stop it sticking) into a ball - you can see how to do this via THIS video. Place it on your baking sheet/pizza peel and let it rest for 40 minutes. Don't worry if the bottom of the dough appears to be a pile of rough ends, in the resting time it will relax and merge with the rest of the dough. You can also make other shapes like plaits or rings.


6) 20 minutes before baking preheat the oven to about 230C, with your marble stone in the middle, and an empty roasting tray/pan on the bottom shelf.


7) Dust your loaf lightly with flour and slash whatever pattern you like into your bread, using a serrated knife (a cross, tic tac toe, scallop). Get about a cup of water ready by the oven, and then take your dough to the oven and slide your dough with a quick flick of the wrist onto the marble stone. Pour the water into the roasting pan underneath your marble slab and shut the oven door to trap the steam (this helps the crust develop).


8) Bake for about 30 minutes until the crust is golden and the bottom of the loaf sounds hollow when tapped.  The loaf should rise while cooking (oven spring) and you should have a crusty delicious loaf of bread!


Tuesday, July 10, 2012

Artisan Bread in 5 minutes a Day - Jeff Hertzberg and Zoë Francois

I have a pretty good incentive to start baking my own bread. It's just been reported that one of the big supermarket chains, Coles, has been implying that their Irish soda bread was fresh baked, when it was actually imported from Ireland. I don't normally buy much from Coles or Woolworths, because I don't like or trust them anyway, but its as good a reason as any to bake my own fresh bread! Bakery bread is awesome but it does get expensive if you're buying it all the time!


I bought this book a couple of years ago but never got into it for one reason or another. However now that I'm on school holidays I have the time to have a go! Artisan Bread in 5 Minutes a Day by Jeff Hertzberg and Zoë Francois has, through years of trials and testing, broken down the steps necessary to bake great bread. The idea is that you make one master batch of dough and keep it in the fridge, then take out a grapefruit sized ball of dough, shape it, rest it and bake it. I was skeptical about it really being THAT easy.


It is.


The dough is awesome, and contains only yeast, flour, salt and water. Its elastic and I used yeast that was past its use by date, so I added an extra sachet to be sure. That thing rose like a champion, it was coming out of the mixing bowl!


It's recommended that you refrigerate the dough overnight before your first loaf, but I was impatient and baked one last night. It came out well, but didn't rise loads - I also realised I had the oven on too low, so that wouldn't have helped!


I left the dough in the fridge overnight, and then baked a small loaf this morning, this time following the instructions exactly and got a MUCH better looking loaf! It rose a lot in the oven which was great!


The dough is meant to take on sourdough qualities the longer it stays in the fridge, and its said to last 14 days. When you take the dough out of the fridge it is tough yet elastic, it's a bit sticky but managable. I have a metal spoon next to it in the fridge to scoop out the dough, it's quite cool how it stretches, and it feels like great dough. I felt like I knew what I was doing!


The book has a variety of recipes, variations and really helpful advice and explanations on just about anything you can think of, as well as recipes for different flours.


I'm really looking forward to getting stuck into this book, because so far it's been really manageable to have a great loaf of bread, every day! I don't think we'd have time to bake it before work, because of the resting/cooking time, but you'd def have fresh bread at night, ready for the next day. The dough is so easy to make and so low maintenance, and then grabbing the dough from the fridge and shaping it is really easy too.


Given that Saturday is Bastille Day (July 14th), I'm going to make some baguettes! Stay tuned to see how they turn out!

Monday, July 9, 2012

Sweet n Savoury Scrolls

Upon looking at the ridiculous collection of jars in my fridge, I decided today that I was going to use some of them up, somehow. I had been reading a breadmaking book earlier, and so I thought that making some scrolls with a variety of different fillings with bits and pieces from the fridge! I recently bought a whole box of seconds strawberries from a local berry farm (Berry Sweet), and because I had so many I made strawberry compote earlier in the week, I figured this would be a great way to use some of it up! I also decided that the Homestay Organic Plantation mango chutney and Margaret River Organics "Cowaramup Crumble" cheese (both from the Urban Locavore box!) would be great together... So I split the dough in half and made both!


I used Nigella Lawsons dough from her Norwegian Cinnamon Scroll recipe, and just changed the filling! It was a beautiful dough to work with, in saying that, it was my KitchenAid that did most of the work! It was originally very sticky, but with a dusting of flour it became very managable! It was soft, supple and elastic - I needed my bakers spatula though!


Heres the recipe for the dough, what you will it with is up to you though!

Ingredients
600 g flour (plus a bit extra for dusting)
100 g sugar
½ teaspoon salt
21 g (3 sachets-yes, really) easy blend yeast or 45 g fresh yeast
100 g butter
400 ml milk
2 eggs

Fillings
Margaret River Organic Creameries "Cowaramup Crumble" (use as much or as little as you like, I used about 1/3 of the block)

Homestay Organic Plantation mango chutney ( I used about 1/3 jar, but you can use more if you like, but I wouldn't recommend using less as you'll get all dough with too little filling!)


Thyme, for sprinkling

4-5 tbsp berry compote or other stewed fruit (if using other stewed fruit you'll need closer to 1 cup to cover the dough)


Sugar, for sprinkling

Method
1) Combine the flour, sugar, salt, and yeast in a large bowl. Melt the butter and whisk it into milk and eggs, then stir it into the flour mixture. Mix to combine and then knead the dough either by hand or using the dough hook of a food mixer until its smooth and springy-add extra flour until the dough becomes a good rolling consistency. Form into a ball, place in an oiled bowl, cover with clingfilm and leave it to rise for about 25 minutes.

2) Take one-third of the dough and roll it or stretch it to fit your tin; this will form the bottom of each bun when it has cooked. The tin should be wider rather than tall, otherwise the middle takes far too long to cook, drying the edges out. Roll out the rest of the dough on a lightly floured surface, aiming to get a rectangle of roughly 50x25cm, roughly 1cm thick.


3) I cut the dough in half and spread one half with about 1/3 jar of mango chutney and grated a generous amount of cheese over the top. On the other side I spread about 4 tablespoons of strawberry compote over the dough.

4) Roll it up from the longest side until you have a giant sausage. Cut the roll into 2 cm slices which should make about 20 rounds. Sit the rounds in lines on top of the dough in the tin, swirly cut-side up - half savoury on one side, half sweet on the other. Don’t worry if they don’t fit snugly together as they will swell and become puffy when they prove. If you have some left over then pop them in a muffin tray for individual serves! Brush them with egg, sprinkle the savoury side with thyme and the sweet side with sugar, and let them rise again for about 15 minutes to let them get duly puffy.

5) Put in the hot oven and cook for 20-25 minutes, by which time the buns will have risen and will be golden brown in colour. Don’t worry it they catch in places. Remove them from the tin and leave to cool slightly on a rack - it’s easy just to pick up the whole sheet of parchment and transfer them like that - before letting people tear them off, to eat warm.


No Chocolate Brownies

Upon seeing that S had eaten ALL the chocolate in the house, I had to laugh at his expression when he said he wanted something chocolatey. All forlorn and sad, because he knew the reason there was no chocolate had nothing to do with anyone else but him. I think I ate about 3 squares of it. Super gf to the rescue - I offered to make him something baked with chocolate. I loved the look on his face again, he told me I was a wizard in the kitchen. I took the compliment - I didn't really feel like telling him at that time we had loads of cocoa in the pantry!


So I flicked through Donna Hays Fast, Fresh and Simple, and found a recipe for brownies which had been designed for times when the chocolate stores had been chipped away by nibblers and snackers! Perfect!


Not so perfect though, if you're on a diet, or healthy eating plan or anything like that. Still have some of course, they're delicious! Just do like I did, and cut them up into quite small squares... and hide them! I added a tablespoon of cinnamon into the mix which added a spiced warmth to these already moreish bites!


Standby Brownies
Ingredients
150g butter
1.75 cups caster sugar
3/4 cup cocoa
1 tsp vanilla extract
3 eggs
1/2 cup flour


Method
1) Preheat oven to 160C.
2) Place the butter, sugar and cocoa in a saucepan on a low heat, and stir until the butter has melted. 
3) Spoon into a bowl and add the vanilla and eggs, whisking well.
4) Sift the flour over the mix, and stir to combine.
5) Pour the mix into a 20cm square cake tin lined with non stick baking paper, and bake for 30-35 minutes until the centre is just set.
Makes about 16.

Sunday, July 8, 2012

Baked Beans - Bill Granger


In an effort to have bigger and more filling breakfasts, we've been buying more baked beans. But really, making your own beans is really easy, you know exactly what goes into it and you can put some extras in that you really like! I've made baked beans before, for my Breakfast with Benefits , and they went down really well - so I thought I'd give it another go! I saw the recipe in Bill Grangers book "Everyday" and the ingredients looked delicious, so that's the recipe I followed. I realised when making it I only had one can of cannellini beans - so I used a can of chick peas instead. It's still really delicious.


I'd love you to try these, they're delicious and what an amazing start to the day, if you have a chunky piece of good sourdough, a poached egg, and these beans poured over top! A hearty breakfast like that will set you up for the day, and will make you a morning person!


Serves 6
Ingredients


1 tbsp olive oil
1 onion, finely chopped
100g pancetta, chopped
1 garlic clove, crushed
2 anchovies, chopped
1 tsp fresh thyme leaves
1/2 tsp dried oregano
400g tin chopped tomatoes
2 x tins cannellini beans, rinsed
sea salt and fresh ground black pepper


Method


1) Preheat the oven to 160C
2) Heat the olive oil in a large flame proof casserole dish over medium heat. Add the onion and cook, stirring for 5-6 minutes until the onion is soft.
3) Add the pancetta and cook, stirring occasionally, for 5 minutes or until slightly crisp.
4) Add the garlic, anchovies, thyme, and oregano and cook, stirring for another minute.
5) Add the tomatoes, 1/2 cup of water and bring to the boil. Reduce the heat and simmer for 10 minutes.
6) Stir in the beans, put a lid on the casserole dish and bake in the oven for 30 minutes. Season with salt and pepper.